Are you preparing for an important event on the Facebook platform but you don’t know where to start? Don’t worry, because, in today’s article, we will help you solve all your problems! Creating an event on Facebook not only promotes your products effectively but also attracts the attention of a large number of potential customers. The event will help increase interaction, develop the community, and create events on social networks professionally and attractively. Let’s explore the concept and benefits of creating events on Facebook and quick steps to bring about the expected results with Optimal Agency!
| ☑️ Qualitiy account 💯, no worries about getting lock | ☑️ Immediate use, unlimited spending |
| ☑️ Best rental price | ☑️ Create campaign freely |
| ☑️ Many offers | ☑️ Optimized ads campaigns |
| ☑️ Consulting fast approved ads | ☑️ Safe, secure, effective and affordable |
| ☑️ Diverse services, accounts | ☑️ 24/7 technical support |
Learn about the event on Facebook
Facebook Events, also known as Facebook Events, is a feature that allows sellers to notify their customers about an important business event that will take place on the social networking platform. This. This is an effective tool to help connect and interact with customers directly and effectively. For example, when you want to host a new product launch for your business on Facebook, you can schedule and create a Facebook event. Through this event, you can send announcements to your current and potential customers, inviting them to join to learn more about the product. Customers will receive a notification of the event and can express interest or commit to attending by clicking the “Join” or “Interest” button.
Creating events on Facebook not only helps you promote your products directly but also helps build closer relationships with customers. Customers have the opportunity to participate, ask questions, and receive direct feedback from you, creating a vibrant and close interactive space. This not only enhances your brand’s presence on social media but also helps you better understand your customers’ needs and wants, thereby improving your services and products. Additionally, Facebook events can help you collect valuable data about your customers, like the number of attendees, their responses, and engagement levels. This information will be very useful for analyzing and adjusting your business strategy in the future. Thanks to its powerful notification and interaction features, Facebook Event has become an indispensable tool for sellers who want to take advantage of social networks to develop their business and expand their influence.
How to create an event on Facebook
To be able to create an event on Facebook, you can refer to the steps that Optimal shares specifically as follows:
Instructions for setting up Facebook events on personal accounts
To create an event on Facebook using your account, follow these steps:
Step 1: Log in to your Facebook account
- Visit Facebook on your computer and log in to your account.
- In the toolbar on the left, click on Events.
Step 2: Create event
- After entering the Events section, click the Create Event button.
- Facebook will give you two options: create a private event and create a public event:
- Private event: Only people you invite can see this event.
- Public event: Anyone can see this event.
Step 3: Fill in the information for the event
- After choosing the appropriate event type, you can proceed to the step of filling in the necessary information for the event:
- Event name: Give it a short and memorable name so participants can easily identify it.
- Event description: Provide detailed information about the event, goals, and benefits of participating.
- Time and location: Determine the date, time, and location of the event.
- Event image: Add an image representing the event to attract attention.
Step 4: Create an event
- Once you have filled out all the information, check all the details to make sure there are no errors.
- Finally, click the Create Event button to complete the event creation process.
Once the event is created, you can share it on your wall, invite friends and customers to join, and easily track and manage the activities taking place during the event. Creating an event on Facebook not only helps you promote your product or service but also creates an effective communication channel with customers.
Instructions for setting up Facebook events on Fanpage
If you want to create an event right on your sales fanpage, you can follow these steps:
Step 1: Log in to your Facebook account and select the fanpage you want to create an event for
Visit Facebook on your computer and log in to your account.
Select the fanpage where you want to create an event.
Step 2: Select Events
- In the fanpage interface, in the left toolbar, select Events.
- You will choose one of two types of events: Online and Face-to-face:
- Online event: Participants will video chat using Messenger or the event host will broadcast live using Facebook Live to interact with customers.
- Face-to-face event: People will meet together in a specific location.
Step 3: Set up event information
- After selecting, you proceed to set up the necessary information including:
- Event name: Enter the name of the event you want to organize. Event names must be in standard capitalization and must not use too many special characters.
- Description: Record necessary information related to your event.
- Time: Set the start and end time of the event.
- Category: Select the category that matches your event.
- Location: Choose the event location, especially important for in-person events.
- Event photos or videos: Upload photos or videos of your choice. If there is no photo, the event will automatically take the fanpage’s cover photo.
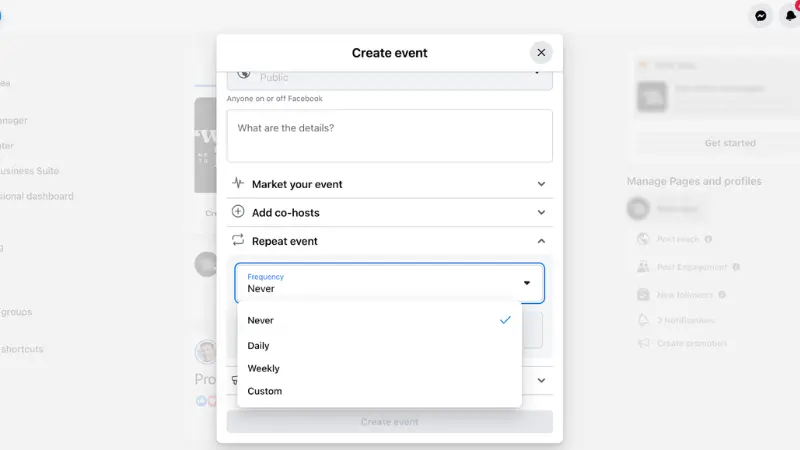
- Event settings: Set up more detailed settings such as privacy, event frequency, and more.
Step 4: Create an event
- After filling in all the information and checking the details to ensure there are no errors, click the Create Event button to complete the event creation process.
Once the event is created, you can promote it on your fanpage, invite customers to join, share the event on your wall, and follow the activities taking place during the event easily. Creating events on Facebook not only helps you increase customer engagement but is also a powerful tool to promote your products or services.
Instructions for setting up Facebook events on Facebook Group
Facebook groups are also where many sellers use to promote products and interact with their customers. So do you know how to create an event on Facebook Group? If not, please refer to the method below:
Step 1: Log in to Facebook and select the Facebook Group you want to create an event
- Go to Facebook and log in to your account.
- From the main interface, select the Facebook Group you want to create an event for.
Step 2: Select Events
- In the group’s interface, in the toolbar on the left, select Events.
- Then click the Create Event button.
Step 3: Fill in the necessary information for the event
- Event name: Enter the name of the event you want to organize. Make sure the event name is clear, concise, and catchy to capture the attention of team members.
- Photos and videos: Upload photos or videos that represent the event. The image or video should be closely related to the event’s theme and prominent enough to attract attention.
- Event type: Select the appropriate event type (for example, online or in-person event).
- Location: Enter the event location, if applicable (especially important for in-person events).
- Time: Set the start and end time of the event.
- Description: Write a detailed description of the event, including information about the content, goals, and any other details participants need to know.
Step 4: Create an event
- After filling in all the information and checking the details, click the Create button to complete the operation.
Once an event is created, you can start promoting it in the Group, invite members to join, share the event on the group wall, and track event-related activities easily. Creating an event on a Facebook Group not only helps you increase interaction with customers but is also a useful tool to promote your products or services. Besides, do you know how to build a community group on Facebook? If not, learn it today.
In the article on Optimal Agency, we have listed the detailed content most accurately. We hope that the information we have shared can help everyone in learning about the concept. Facebook event and go through the steps to create a Facebook event.
Please see more:
- How to delete events created on Facebook simply and quickly
- How to create a business ads account on Facebook 2024
- how to create Pixel TikTok a simple for beginners
Frequently asked questions
To create an event on Facebook using your computer, follow these steps. First, log in to your Facebook account. From the main interface, find and select “Events” on the left toolbar. Next, click the “Create event” button. You will have two options: public event or private event. Choose the event type that fits your goals. Then, fill in the necessary information such as event name, time, location, description, and event cover photo. Finally, click “Create” to complete the event creation process. Once created, you can invite friends to join and promote the event to attract attention.
To hide attended events on Facebook, follow these steps. First, log in to your Facebook account. Access your profile by clicking your name in the top right corner. On your profile page, find and click “See more” below the cover photo, then select “Events”. In the list of events, find the event you want to hide and tap the three-dot icon next to the event name. Select “Hide from timeline” so the event is no longer visible on your profile. Thus, you have successfully hidden the attended event from the attention of others.