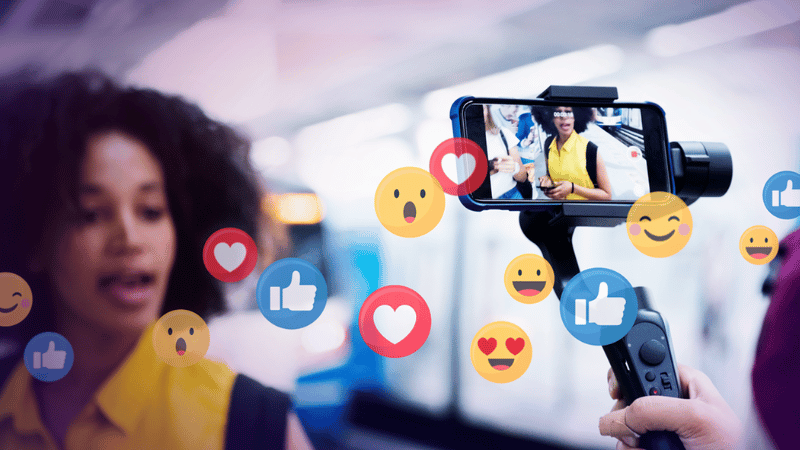
Facebook Live is not just a simple live streaming tool; it is also a powerful “weapon” that helps individuals and businesses reach customers most authentically and interactively. However, it is not simply a matter of turning on a live stream to get viewers, nor does streaming frequently guarantee effectiveness. The difference lies in how you prepare your content, interact during the broadcast, and leverage the features of Facebook Live. In this article, Optimal Agency will guide you on how to use Facebook Live effectively, helping you increase views, retain viewers longer, and turn each livestream session into an opportunity to create real value.
Essential tools and software for effective Facebook Livestreaming
For a Facebook Live session to achieve high efficiency, not only is the content important, but the supporting equipment and software also play a decisive role. Many of you think that livestreaming requires investing in an expensive system, but in reality, that is not necessary. We have tested many different setups and realized that as long as you choose the right tools, you can completely livestream professionally with beautiful images and clear sound while keeping costs very reasonable. Below are the equipment and software that we recommend advertisers, sellers, and content creators use for stable and effective Facebook livestreams.
Equipment needed when livestreaming on Facebook
Basically, you only need to focus on three main factors: sound, lighting, and visuals. When these three factors are guaranteed, the quality of the livestream will be much superior to most ordinary live sessions.
Recording microphone for a clear, professional voice
The first piece of equipment we recommend you invest in is a microphone. Poor audio will make viewers leave very quickly, even if your content is good. The good news is that you don’t need to buy an overly expensive microphone. A choice worth considering is the Audio Technica AT2020. This microphone provides clear sound quality with low noise and is very suitable for livestreams involving talking, consulting, or selling. The price is about $150, but the results are completely worth it. Just by handling the audio well, you have already surpassed many other livestreams.
Light source determines image quality
After sound, lighting is the most important factor when livestreaming. Many people think they need a lot of lights, but in reality, just one good light source is enough. We often use Neewer lights priced at about $220. This light provides even illumination, true colors, and is very easy to adjust. In fact, lighting is even more important than the camera. With a good light, you can completely use a phone camera, and the image will still be bright, clear, and professional.
For example, many advertisers selling cosmetics or fashion only need one quality light for skin tones to look better and for products to show clear details, helping to increase trust and the closing rate.
Camera for sharp images
If you want truly outstanding and more professional images, investing in an additional camera is entirely reasonable. We are using the Face Cam Pro; this is a 4K webcam that can be plugged directly into a computer and provides very sharp images.
This camera is suitable for training livestreams, knowledge sharing, or high-end sales, where visuals play an important role in building personal branding and credibility. The total cost for the microphone, light, and camera is less than $800, a very reasonable investment for anyone who wants to take Facebook livestreaming seriously and long-term.
Recommended software for Facebook livestreaming
Good equipment is one part, but to livestream professionally, you need powerful supporting software. We have tried quite a few different livestreaming programs, but ultimately we returned to using Restream because of its stability and convenience.
Restream for effective Facebook livestreaming
The first reason is the high level of customization. With Restream, you can add brand colors, titles, frames, and animation effects to make the livestream look more professional. When livestreaming, we always display subtitles (lower thirds) at the bottom of the screen so viewers clearly know the content being shared. For example, when live-streaming an ad-running tutorial, subtitles help viewers follow the content flow more easily and stay longer.
Increasing interaction and managing content easily
Restream allows for displaying and interacting directly with audience comments right on the livestream screen. This is very useful for sellers, as they can answer customer questions immediately, creating a sense of closeness and increasing the purchase rate. Additionally, the software also supports screen sharing, video playback, and adding audio very simply. If you are livestreaming a training session or a product demo, screen sharing will make the content more visual and persuasive.
Invite guests to join the livestream and conduct post-live analysis
Another strength of Restream is that inviting guests to join a livestream is extremely easy. You only need to send a link; the invited person does not need to install any additional software to join the conversation directly on the livestream.
After the live session ends, Restream will send full analytical data via email, such as the number of viewers, the moment viewers left, and which segment was viewed the most. This data helps advertisers and content creators learn from experience, improve scripts, and enhance the effectiveness of subsequent livestreams. When combining the right equipment with the right software, Facebook Live is not just simply broadcasting video, but becomes a powerful tool to build a brand, create trust, and bring in sustainable revenue.
Guide on how to use Facebook Live effectively
Facebook Live is a very powerful tool if you know how to exploit it correctly. However, in reality, many advertisers and sellers still livestream based on intuition, turning on the live and waiting for Facebook to distribute it automatically. The result is low viewership, poor interaction, and no conversions. In this section, we will guide you on how to use Facebook Live systematically, from broadcasting techniques to marketing strategies before and after the livestream to maximize effectiveness.
How to livestream on Facebook using software
In addition to livestreaming directly with a phone, you can completely use livestreaming software to better control visuals, audio, and scripts. Popular software today includes OBS or specialized livestreaming tools. You can livestream from a personal profile or a Facebook group, depending on your reach goals. To start, just click the “Live Video” button on Facebook, then choose to use livestreaming software. Facebook will provide you with a Stream Key and RTMP URL. Your task is to copy these two pieces of information and paste them into the livestreaming software.
After connecting successfully, the software will show the status as connected to Facebook. However, many people get confused at this step. The software being connected does not mean you are on air. You still need to return to Facebook and click the “Go Live” button to officially broadcast. A very important note is that before clicking Go Live, you must enter a title and description for the livestream. If either of these is missing, Facebook will not allow you to broadcast. The title should be concise, hitting the viewer’s benefits directly. The description can explain the live session’s content in more detail or call for viewer interaction.
Marketing for livestream is the decisive factor for success
The most important thing we want to emphasize to advertisers is never to just go live and hope Facebook will automatically notify everyone. The algorithm only supports a part; the rest depends entirely on how you market the livestream. You need to let viewers know two things clearly: first, when you will livestream; and second, why they should spend time watching that live session. If these two questions are not answered, it is very difficult for the livestream to have viewers, no matter how good the content is.
Marketing for a livestream includes both promotion before the live and promotion after the live. Before livestreaming, you should post announcements, create curiosity, or share the benefits viewers will receive. After the livestream ends, do not forget remarketing because a large part of the actual viewers will watch the video again later. In one livestream sales campaign we implemented, to pull in viewers, we used about 7 Facebook posts combined with 11 emails sent to the old customer list. The result was that the number of people re-watching after the livestream was even higher than during the live session.
Handling the issue of Facebook deleting live videos after 30 days
A point that many of you do not notice is that Facebook only stores livestream videos for 30 days. After this time, the video will be deleted from the platform if you do not take action. The first option is to create true scarcity. You can remind viewers that the video only exists for 30 days, after which it cannot be viewed again. This is a real urgency, not a trick, and can motivate viewers to act sooner.
The second option is to download the livestream video and repost it as a regular video. To do this, go to your Activity Log, select the “Live Videos” section, then download the MP4 file to your computer. Once you have the file, just repost that video to Facebook as a normal video. This method helps store the content permanently and continues to exploit the video for marketing, advertising, or remarketing purposes later. When combining correct livestreaming techniques, marketing strategies before and after the live session, and post-broadcast content handling, Facebook Live will become an extremely effective channel for brand building, increasing interaction, and generating sustainable revenue.
Safe Restream tips on Facebook
Restream is currently a tool used by many advertisers, streamers, and businesses to broadcast livestreams simultaneously to multiple platforms, with Facebook being the most important channel. However, if set up incorrectly or if permissions are insufficient, the livestream may error out, be interrupted, or even cause the Facebook account to be assessed as high-risk. In this section, we will guide you on how to restream to Facebook correctly and safely, helping the livestream session operate stably and minimizing unwanted incidents.
Step 1: Access the Restream dashboard and log in
First, you need to access the Restream dashboard. If you haven’t logged in, log in immediately with your account. After logging in successfully, you will see a dashboard interface designed intuitively, friendly, and easy to use.
Step 2: Add a Facebook channel to Restream
Next, look at the left column of the dashboard and find the “Channel” section. Click here, then select “Add Channels” to add a new channel. Restream will display a list of platforms that can be connected; in this case, we choose Facebook. At this step, you need to clearly determine whether you want to livestream from a personal Facebook profile or a Facebook Business Page.
Step 3: Choose the appropriate Profile or Page
If you are livestreaming for personal purposes or personal branding, choose the “Profile” option. Conversely, if you are livestreaming for sales, sharing content for a business or fanpage, advertisers should choose the “Page” option to broadcast directly from the Facebook Page. After selection, Restream will automatically transfer you to Facebook for authentication.
Step 4: Grant permissions and authenticate with Facebook
During the authentication step, Facebook will ask you to grant permissions to Restream. This is a very important part, because if you do not grant the full necessary permissions, the livestream may not display or may error out when broadcasting. We advise you to allow all the permissions that Facebook requests, including the right to broadcast live video and manage pages. After authentication is complete, Facebook will display a list of profiles or pages for which you have administrative rights.
At this point, you just need to select the desired fanpage or confirm the personal profile. When finished, a new Facebook channel will appear in Restream’s channel list, indicating the channel is ready to livestream.
Step 5: Create a new livestream flow
Once Facebook has been successfully connected, we start creating the broadcast. In the Restream interface, click on “New Stream” to create a new flow. Restream will give you two popular choices. First is using Restream Studio directly on the browser. This method is suitable for quick live sessions that do not need overly complex setups. The second option is using an encoder like OBS via RTMP. This method is suitable for professional advertisers or streamers who need more customizations, like inserting images, videos, transition scenes, or multiple camera sources.
Step 6: Optimize livestream title and description
Before broadcasting, you need to enter the title and description for the livestream. This is the information viewers see first when the video appears on Facebook, so write it concisely, clearly, and focused on the content.
Step 7: Select the broadcast channel and start livestreaming
After completing the content, check the channel list again and ensure that Facebook is turned on. If you restream to multiple platforms simultaneously, make sure only the necessary channels are activated to avoid confusion. When everything is ready, you just need to click “Go Live.” Immediately, the livestream will be broadcast to Facebook via Restream.
Facebook Live will bring high efficiency when you know how to prepare content, choose the right time, and interact continuously with viewers. Instead of livestreaming based on intuition, apply the right strategy and make the most of the features Facebook provides. When done correctly, each live session not only helps increase reach but also creates trust, builds a brand, and drives sustainable business results.
Frequently Asked Questions
The time limit for broadcasting live on a computer, via livestreaming software, or from a mobile device is 8 hours.
When you broadcast live on Facebook, your live video will be automatically uploaded to your profile, page, or group after the live broadcast ends. You can click on the video and click share in the bottom right corner to share the livestream as a recap post. Alternatively, if you want to download the video to share or upload to another platform, click on the option to download the video file as soon as the video is uploaded.