Google Tag Manager is a tool that helps website owners or web developers manage tracking codes and advertising tags easily. If you want to learn more about this tool and how to use Google Tag Manager system, follow the article.
| ☑️ Qualitiy account 💯, no worries about getting lock | ☑️ Immediate use, unlimited spending |
| ☑️ Best rental price | ☑️ Create campaign freely |
| ☑️ Many offers | ☑️ Optimized ads campaigns |
| ☑️ Consulting fast approved ads | ☑️ Safe, secure, effective and affordable |
| ☑️ Diverse services, accounts | ☑️ 24/7 technical support |
What is Google Tag Manager?

It is a free tool for managing tags on websites. This tool allows website administrators to add, modify, and manage Tag codes on the website to measure the effectiveness of Marketing activities. Also, businesses can manage JavaScript and HTML tags or update the website when needed.
With an intuitive, user-friendly interface and using online connectivity protocols, this tool helps you add and edit tags from Google Analytics tracking codes to third-party advertising codes easily. The utility tracks how users interact with the website: page views, time spent on page,…, and is detailedly updated by the tool. Besides, it allows for managing versions of changes made to the website.
If you know how to use Google Tag Manager, you can track user activity on the website and create events for specific goals or integrate third-party ads services. Additionally, the system supports managing tags without needing to change the website’s source code whenever changes are needed.
Components and operation of Google Tag Manager
Components of Google Tag Manager
The main components of Google Tag Manager include:
Container: Each website is placed within a container that contains multiple tags.
Tag: It is a piece of code representing a specific tracking or analytics tool deployed on a website.
Trigger: Determines the conditions under which a Tag operates.
Variable: Any component of an element such as URL, Click ID, Click Class, Path,… Variables provide additional detailed information about Triggers for Google Tag Manager to activate Tags accurately.
Operation of Google Tag Manager
The operational mechanism of this tool involves using a single JavaScript code snippet you add to the website as a container for all the tags you want to manage. It is capable of detecting user interactions: page views, website visits,… When a user loads a page, the tag manager detects that action.
Then, the checking system of Google Tag Manager will verify if the user’s action matches the triggers set in the Tag Manager. If the interaction matches, the associated tag will be activated.
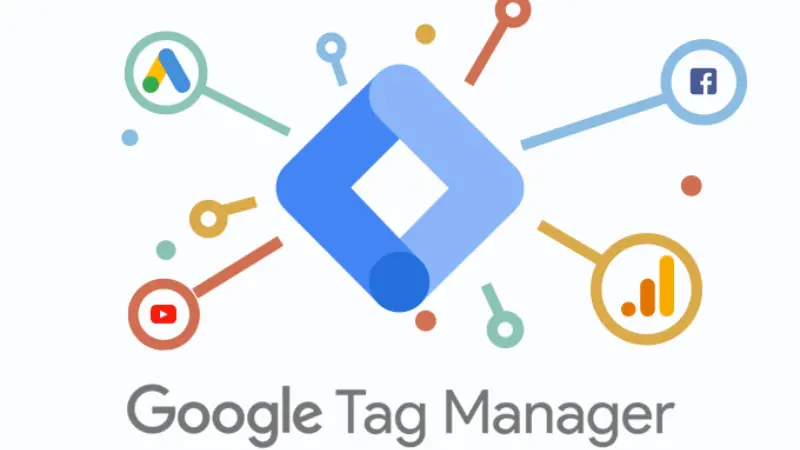
Here, the tags can be code snippets for Google Analytics or other marketing platforms. Or an event you want to track. After the tag is activated, the code will be injected into the website. Now, the relevant data processing tags will send that data to third-party services such as Google Analytics or Facebook Pixel….
>>>Learn more: Google Ads demand gen campaigns
Why you should use Google Tag Manager?

Google Tag Manager offers numerous benefits for businesses in managing tracking codes and ads tags on websites:
Centralized and efficient management
This tool can manage all tags and code snippets from a single location. Additionally, Google Tag Manager allows you to add, edit, and delete,… tags on your website with just a few clicks. This enables you to manage tags simply and efficiently, even when there are many tags or products being marketed on the website.
Easy deployment
Google Tag Manager enables your team members to update necessary information and add new tags quickly and easily without needing to change complex code on the website. It facilitates easy testing of each change and deployment of operations without depending on web developers, thereby simplifying processes and speeding up launch times.
Flexibility and time saving
It allows website administrators to easily add, modify, and manage tracking codes and ads tags through an intuitive user interface. Therefore, this saves time and effort compared to directly altering source code on the website.
Moreover, Google Tag Manager allows you to customize tags according to specific needs to track various behaviors. By simply selecting a tag and choosing from preset triggers to determine when the tag is activated or creating your own.
Speeding up the website
By removing unnecessary tags, you can enhance website loading speeds. Especially when you know how to use Google Tag Manager, you can edit tags more easily. The website doesn’t have to load many tag codes, and tags are deployed individually, asynchronously, helping to increase website load speed.
Free of charge
Google Tag Manager is available for free and without limitations. You can use it even with predefined tags such as Marin, comScore, AdRoll,…, and use Google Tag Manager with mobile applications, websites, and AMP pages.
Safety
The tool features comprehensive security functions, ensuring absolute safety with two-factor authentication. Moreover, you can control access by granting permissions at the account level and container level for managing tags.
Effective campaign tracking and analysis
Using Google Tag Manager helps businesses track activities on the website and collect important information: visits, interactions, and user behaviors… This allows you to analyze this information to evaluate the effectiveness of Google Ads campaigns, thereby optimizing user experience and maximizing conversion rates.
>>>Click now: facebook crypto ads
How to set up Google Tag Manager?
Before diving into how to use Google Tag Manager, you have to know how to set up and configure it. The steps are as follows:
Adding a new Google Tag Manager account
First, visit https://tagmanager.google.com, log in to your Google account, and click Create Account to start a new one.
Setting up account and container
In the Account Setup section, fill in your account name and country. For the Container Setup, input container information for easy tracking. Next, select a container platform such as iOS, Android, Web, AMP, Server. After filling in the information, click the Create button to create the account.
Inserting Google Tag Manager code to the Website
A window will appear with the terms you need to comply with when using Google Tag Manager. Read and click Yes. Then, a box containing two code snippets will appear. Copy the first snippet and paste it into the tags <head> </head>, copy the second snippet and paste it into the tags <body></body>.
Checking the setup
After embedding the code snippets, you need to verify the setup is correct. Install the Google Tag Assistant extension to the Chrome browser and ensure it appears on the toolbar.
If the tag is green or yellow, it means you have successfully installed it. But if it’s red, you should check and see what step was done incorrectly and redo it.
How to use Google Tag Management?

You need to understand the 2 main components of Google Tag Manager before starting to use it: Tags and Triggers. Tags will send a message to Google Tag Manager about what you want to do. Otherwise, Triggers will send a message to Google Tag Manager when you want to fire a tag. Once you understand these, you can start using this tool as follows:
Creating a new tag
After creating an account, you need to create a new tag by clicking on the Tag section in the left menu and selecting New. Google Tag Manager will prompt you to select the type of product you want to tag, then select Google Analytics.
Choosing the Analytics Version
At this point, Google Tag Manager will give you 2 choices: Universal or GA4. From July 2022, Google will fully transition to using GA4. This is the latest version of GA and it is already pre-selected. Then you click Continue and provide where the Pageview information is sent to Google Tag Manager.
Configuring Tag structure
In the Tracking ID box, enter the Property ID information to complete the Google Tag Manager tag structure configuration process. The Property ID is obtained from the Google Analytics code installation section.
Selection
After the Google Tag Manager code is installed on the website and you’re wondering if it’s working or not, apply the following check steps:
First, right-click on the main interface of the website and select View Page Source, then find the code there in the format gtm.js. Then, enable preview mode and debug to see if that code appears on the screen.
Next, click on Preview in the top right corner of the Google Tag Manager interface. Finally, access the website and check if the debug panel and Google Tag Manager preview appear at the bottom of the screen.
Activating Triggers
Now, you need to identify trigger activations. Triggers will help inform Google Tag Manager when this tag needs to be activated.
Completing Tag Setup
After activating Triggers, give that tag a short and understandable name for easy tracking.
Now, you should understand how to use Google Tag Manager. Hopefully, this information will help you in managing your website and advertising activities effectively.
Please see more:
- How to Google Ads location targeting
- Instructions for creating effective Google Ads demand gen campaigns
- How to create performance max campaign Google ads?
Frequently Asked Questions
Google Tag Manager collects some general data about trigger activations to monitor the stability and performance of the website. However, this data does not include users’ IP addresses or any specific personally identifiable information.
With the ability to manage all tags on your website without the need for editing, Google Tag Manager allows you to manage tags simply, effectively, easily, and reliably without any cost.
After the Google Tag Manager code is installed on the website and you’re wondering if it’s working or not, follow these steps:
First, right-click on the main interface of the website and select View Page Source, then find the code there in the format gtm.js. Then, enable preview mode and debug to see if that code appears on the screen.
Next, click on Preview in the top right corner of the Google Tag Manager interface. Finally, access the website and check if the debug panel and Google Tag Manager preview appear at the bottom of the screen.