Properly creating and installing a Facebook Pixel is a foundational step if you want to track user behavior, optimize conversions, and reduce Facebook advertising costs. However, for many new advertisers or website owners who are not tech-savvy, the Pixel remains a rather “tough” concept. In this article, we will guide you on how to create Facebook Pixel and install it on your website in a simple, easy-to-understand way, even if you have no programming knowledge, helping advertisers quickly get ready to measure and optimize campaign effectiveness.
Is Facebook Pixel still accurate? Updating data feeding for Pixel 2026
In 2026, many advertisers face the same problem without realizing it from the start: the Facebook Pixel still works, but the data fed to the Pixel is no longer accurate. And when the input data is wrong, the entire optimization algorithm behind it will also head in the wrong direction.

When Pixel data is wrong, what happens?
We take a very practical example from actual running campaigns. There is an ad showing on the Facebook system that it generated 8 calls. However, when cross-referencing actual data from the CRM and call tracking system, that ad only brought in exactly 2 real calls. At this point, Facebook “thinks” this ad is performing extremely well. As a result, the algorithm continues to pour more budget into that ad, while other ads with real effectiveness are not prioritized for spending. This causes the entire campaign to suffer from skewed budget allocation, rising CPA, and a sharp decline in overall efficiency.
Andromeda update and how Facebook optimizes in 2026
Since Meta deployed the Andromeda update, Facebook has increasingly relied on output results, which are the events the Pixel receives. Whichever event is reported more, Facebook will consider a good signal and push the ad to more similar people. The problem lies here: if that event does not accurately reflect the actual behavior of the user, Facebook still optimizes based on that false data.
Consequently, the ad is distributed to the wrong audience, with the wrong intent, and at the wrong time. In practice, when auditing many different ad accounts, we notice over-reporting occurring in many campaigns. Some ads report 4 calls, but actually have only 1. Others report 3 calls but only yield 1 customer. There are even cases where Facebook reports 3 calls, reality shows only 2, but they generate one high-quality customer. These ads should have been prioritized for budget, but because the Pixel data was wrong, everything became completely unbalanced.
The root cause: An event was triggered too many times
After reviewing the entire tracking system, we discovered the main cause comes from an event being triggered multiple times for the same user.
Specific example: A user schedules a call for the first time; the Pixel fires a “Call Scheduled” event. Later, they reschedule, and the event fires again. Then they book a follow-up call, and the event fires yet again. The result is only 2 real people, but the Pixel records 6 to 7 events.
In this case, there is a user who does not qualify as a customer but reschedules many times. Facebook misunderstands these as multiple different conversions and begins optimizing the ad to find more people “like that.” This makes lead quality increasingly worse while the budget continues to be pushed heavily.
How we fixed it and the results after re-optimizing the Pixel

Last week, we completely resolved this issue by standardizing the event trigger logic. Each user is now recorded for exactly one truly valuable action, rather than firing an event every time they perform a repeat operation. The results after the fix were very clear. For an ad with 7 calls, Facebook reported exactly 7. For an ad with 1, Facebook reported exactly 1. Data cannot reach 100% accuracy yet, but it is much better than before. When Facebook receives correct and clean data, the algorithm starts optimizing based on actual results. Budget is allocated more accurately, CPA decreases, and truly good ads begin to scale.
Facebook Pixel is not “dead,” but how you feed data to the Pixel is the deciding factor. In a context where Meta increasingly depends on input data for automated optimization, controlling events, avoiding duplicate firing, and ensuring each signal correctly reflects user behavior is mandatory. If you see ads “highly rated by Facebook” but actual business results do not match, it is very likely that the problem lies not in creative or targeting, but in the Pixel lying to the algorithm.
How to create Facebook Pixel and install it simply on a website
If you are using WordPress, especially WooCommerce, the fastest way is to use the “Meta Pixel for WordPress” plugin. You just need to search on Google for the keyword “official Facebook pixel for WordPress” or go to the plugin library in WordPress to install it. Once installed, the plugin will provide step-by-step instructions to connect the website with the Business Manager. An important note is that you must have a Business Manager to manage pixels, ad accounts, and other assets. In practice, we often set up the entire system—from Business Manager and ad Facebook accounts to pixels—right from the start to avoid errors later on.
An indispensable tool when working with Facebook Pixel is Meta Pixel Helper. This is a Google Chrome extension that helps you check if the pixel is working and if events are being recorded accurately. After installation, every time you visit the website, Pixel Helper will display the pixel status. For example, when a user visits the homepage, you will see a PageView event. When they view products, add to cart, or check out, the corresponding events will also be clearly displayed.
Creating and managing Pixels in Ads Manager
Next, we access Ads Manager and go to the Data Sources section. The common path is Business Settings → Data Sources → Pixels. Here, you can create a new pixel or check the one currently in use.
In practice, we usually double-check the overview section to see if key events are active. For a regular website, PageView is the basic event. For e-commerce, advertisers need to pay special attention to events like ViewContent, AddToCart, InitiateCheckout, and Purchase. This is the foundation for Facebook to optimize conversion ads.
Checking data quality and advanced settings
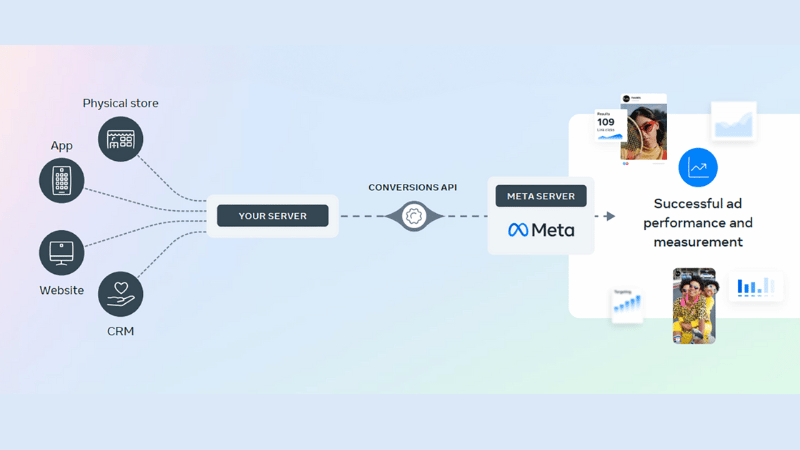
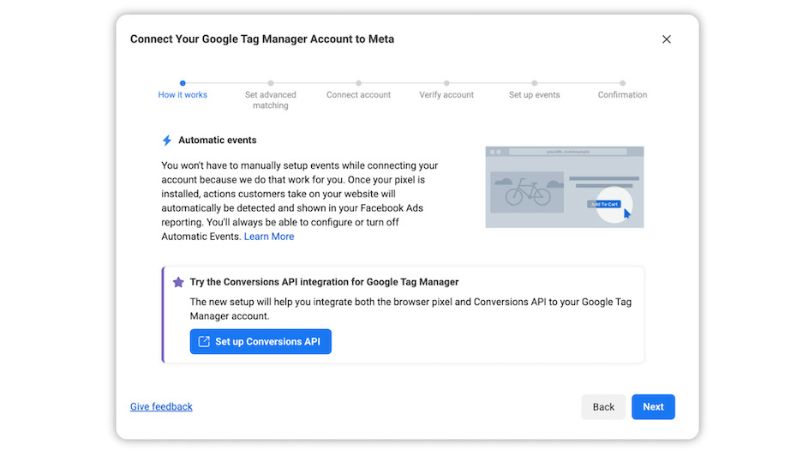
In Facebook Ads Manager, you should pay attention to the Diagnostics section to ensure clean data. A faulty pixel or missing events will cause Facebook to learn incorrectly and drive ad costs very high. In the Settings tab, we often enable options like “Track events automatically without code” and “Conversions API Gateway” to increase data accuracy. Additionally, you can check which Business Manager owns the pixel, avoiding situations where the pixel is wrongly attached or used by others.
A small tip is to control Traffic Permissions, allowing or blocking domains from sending data back to the pixel. This helps prevent cases where the pixel is exposed and messes up advertising data.
Testing Pixel events in real-time
The Test Events section is where we verify the pixel’s actual performance. You just need to enter the website URL and then browse as a normal user. When the page opens, you will see PageView triggered. When adding a product to the cart, the AddToCart event will display along with value, currency, and Content ID. For example, with Shopify, the Content ID is the product ID in the backend system. Thanks to Shopify’s built-in integration, all this data is sent to Facebook completely automatically, which is very convenient for advertisers.
Setting up events without code
If you are not tech-savvy, you can absolutely use the Event Setup Tool to manually set up events without coding. You just need to select a URL or a button and assign the corresponding event, such as Lead or Purchase. For lead generation campaigns, we often set a static value for each lead. For example, if the closing rate is 20% and the average order value is $1,000, then each lead can be assigned a value of $200. This method helps Facebook optimize better for conversion campaigns.
Other Pixel installation methods
Besides WordPress and Shopify, you can also install Facebook Pixel via Google Tag Manager, Google Analytics, third-party integrations, or by manually inserting code. However, in our practical experience, Shopify and WooCommerce remain the two easiest and most stable platforms for beginners to deploy. If you run e-commerce, don’t forget to connect the catalog to the pixel. This is extremely important for Dynamic Product Ads, helping Facebook know exactly which product the user viewed to remarket that exact product.
Duplicate tracking errors on websites: Causes and fixes
During the process of running Facebook ads, especially with conversion optimization campaigns, incorrect or duplicate event tracking is one of the most dangerous errors. It causes Facebook to misunderstand data, learn user behavior incorrectly, and lead to high CPA and sharply decreased ROAS despite steady traffic. We have encountered many cases where advertisers complain that AddToCart or Purchase is recorded twice or thrice without knowing why. Below are the most common causes and definitive fixes based on practical implementation experience for hundreds of different websites.

Option 1: Duplicate triggers in Google Tag Manager
The most common cause of duplicate tracking is Google Tag Manager. In many cases, the same Facebook Pixel is attached to many different triggers that all fire for the same event.
Practical example: We checked an e-commerce website and found the Add To Cart event triggered twice. When enabling Preview mode in GTM and adding a product to the cart, the system displayed two Facebook Pixel tags firing for one action.
When opening details in GTM, the cause was very clear. One Facebook Pixel AddToCart tag was linked to two different AddToCart triggers. This often happens when multiple people edit GTM or when testing and forgetting to clean up old triggers. The fix is very simple. We just need to go back into that tag, remove one trigger, save, and publish. After previewing again, the event is only recorded once. Meta Pixel Helper also displays a clean status without duplicate warnings.
Option 2: Website running multiple Google Tag Manager containers
Another cause few people notice is the website having multiple GTM containers attached at the same time. This could be an old container from a previous agency, from an added app, or from an old theme that hasn’t been deleted. To check, we open Developer Tools on the browser, go to the Network tab, type “gtm.js,” and refresh the page. Normally, you should only see one single container. If two or more containers appear, tracking will definitely be duplicated.
If you have access to the redundant container, pause or delete the Facebook Pixel tags inside and publish again. If you don’t have access, the only way is to delete that GTM container code snippet directly in the website’s source code. For example, with Shopify, we usually go to the theme.liquid file, find the GTM code, and remove the unused container. Once saved, that container will no longer trigger on the website.
Option 3: Facebook Pixel hardcoded directly on the website
Many websites have the Pixel attached via GTM and also hardcoded directly into the source code without knowing it. This often happens when a developer manually attached the Pixel previously, and then the marketing team added it again using GTM.
To check, just right-click on the website, select View Page Source, then find the Pixel ID using Ctrl + F or Command + F. If the Facebook Pixel code snippet appears, it means the Pixel is being triggered once more outside of GTM.
In this case, we usually coordinate with the dev team to delete that hardcoded snippet. If you can do it yourself, just identify the code’s location and delete it. After deletion, the Pixel will only run through GTM and will no longer be duplicated.
Option 4: Native Integration from the website platform
Platforms like Shopify, WordPress, or WooCommerce all have built-in Facebook Pixel integration via official apps or plugins. If you have both the native integration enabled and Pixel deployed via GTM, tracking is almost certain to be duplicated.
For example, on Shopify, we usually go to Sales Channels, select Facebook & Instagram, and then check the Pixel being used. If this Pixel matches the one attached via GTM, you need to turn off tracking or remove the app to avoid duplication.
The rule here is very clear: each Pixel should only be deployed using one single method.
Option 5: Custom Pixel or Customer Events on Shopify
This is an advanced case, but it is appearing increasingly more with new Shopify websites. Shopify allows creating Custom Pixels through Customer Events, and each Custom Pixel has its own ID.
To check, we open Developer Tools, go to the Network tab, enter the Pixel ID, and then look at the Initiator tab. In the last line, you will see the Custom Pixel ID triggering the event. Next, go to Shopify, open the Customer Events section, use the Inspect function, and find that ID. The pixel causing duplication will be highlighted immediately. Now, you just need to disable or delete that Custom Pixel and keep the main tracking system you are using.
Properly how to create Facebook Pixel and installing it is a mandatory foundation if you want to accurately measure advertising effectiveness and optimize long-term conversions. When the Pixel is standardly deployed from the start, all user behavior data will become the “raw material” that helps us and advertisers make faster decisions, reduce wasted budget, and scale campaigns more sustainably over time.
Frequently Asked Questions
After installing the Facebook Pixel on the website, the user needs to ensure the Pixel is working. To do that, you need to install the Facebook Pixel Helper extension for the Chrome browser. By activating the Chrome extension, the user should access the website where the Facebook Pixel was installed. If the user’s Pixel is working, it will display PageView content when clicking on the extension.
There is no limit to the number of Pixel codes that can be attached to a website. However, with a Facebook Pixel code, you should only attach it to one ad account for easier management. In case you sell products in the same industry linked together, sharing the same customer file, the websites can share 1 Pixel as well.