If you want to optimize the effectiveness of your Facebook ad campaigns and reach more potential customers, setting up Conversion API on Facebook is essential. This tool allows your business to use data about target audiences to achieve the best results. The following article will guide you on how to set up Conversion API on Facebook to leverage the features and potential of this advertising platform.
| ☑️ Qualitiy account 💯, no worries about getting lock | ☑️ Immediate use, unlimited spending |
| ☑️ Best rental price | ☑️ Create campaign freely |
| ☑️ Many offers | ☑️ Optimized ads campaigns |
| ☑️ Consulting fast approved ads | ☑️ Safe, secure, effective and affordable |
| ☑️ Diverse services, accounts | ☑️ 24/7 technical support |
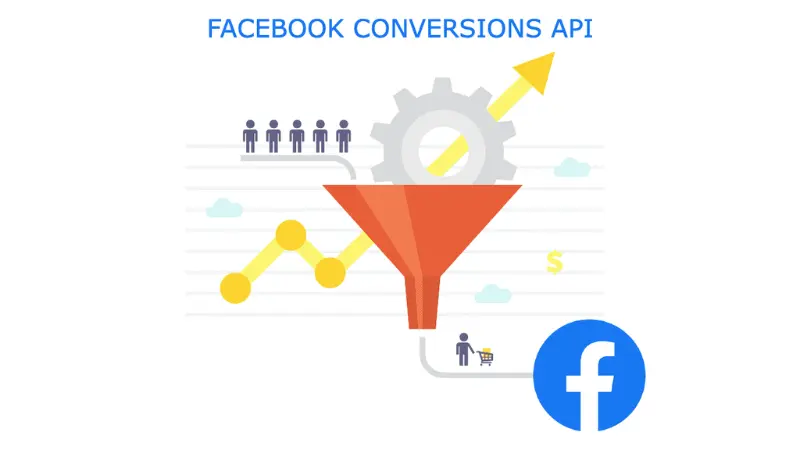
About Conversion API on Facebook
Conversion API on Facebook is an ad tracking tool that establishes a direct connection between Facebook’s system and your brand’s marketing data. With this tool, businesses can optimize targeting, reduce cost per action, and measure results effectively. The Conversion API allows advertisers to collect data and track customer actions on their website through server-side tracking instead of browser-side tracking. Sharing this data helps Facebook improve Pixel tracking, thereby optimizing the performance and results of ads on this platform.
With Conversion API on Facebook, you can push event and conversion data to Facebook Ads Manager while maintaining user privacy. Unlike Facebook Pixel, the Conversion API collects data through your website and shares it with Facebook, enhancing tracking and ad optimization capabilities.
How does Conversion API on Facebook work?
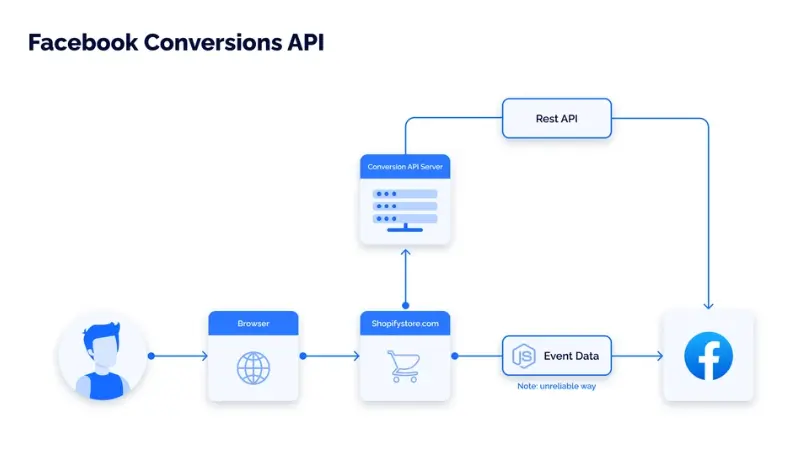
The Conversion API allows ads to be displayed effectively to potential customers. It is designed to create a direct and reliable connection to marketing data, including offline conversions and website events, from your website or server, CRM, to Meta. This marketing data plays a crucial role in optimizing ads, measuring performance, and personalizing ads on the Facebook platform. As a result, ads are shown to those most likely to be interested in your product or service.
The Conversion API on Facebook directly links your website to your Facebook ads. When a user clicks on an ad, Facebook generates a unique ID for them. As they interact on your website, Facebook tracks their actions and sends the corresponding data to you. This ensures you can still collect data on Facebook ads without compromising the privacy and identity of your customers, as each user is protected by a unique ID.
What events can users track with Conversion API?
By using Conversion API on Facebook, you can track the following events:
Website events: The Conversion API enhances the value of tracking customer behavior on your website. Specifically, it helps reduce costs per result due to improved connectivity. You can optimize ads for subsequent actions in the customer journey. Additionally, the Conversion API improves the ability to measure performance and allocate ads effectively.
App events: If you use the Conversion API to send in-app events, you will be less dependent on SDKs and app release updates. This means you can send new event data without maintaining the Facebook SDK for iOS or Android, or relying on app updates.
Offline conversions: By tracking offline events in Meta, you can get a comprehensive view of the customer journey and touchpoints related to your sales activities. Offline events allow you to capture real-world events beyond the scope of what Pixel can track, providing more accurate and detailed data. Using the Conversion API to send offline events allows you to measure in-store actions resulting from Facebook ads. This enables you to create custom or lookalike audiences for more effective targeting.
Messaging events: Sending messaging events through the Conversion API improves the measurement of future events in the customer journey. The Conversion API also connects event information from Messenger, Instagram, or WhatsApp, and optimizes click-to-Messenger ads to increase the likelihood of purchase conversions.
How to set up Conversion API on Facebook?
To set up the Conversion API on Facebook, you can follow these steps:
Step 1: Create Facebook Business Manager and Facebook Pixel
To use the Facebook Conversion API, you need to use Facebook Business Manager and Facebook Pixel. If you have both set up, follow these steps:
- Go to business.facebook.com.
- Click “Create Account” at the top right corner of the page.
- Fill in your details and click “Next.”
- Check your inbox and open the verification email from Facebook. Click “Confirm Now” to open your account.
- Start a Facebook Page by clicking the “Add Page” button (you don’t need to complete your Page now; you can customize it later).
- Go back to the dashboard and click “Add Accounts to Business Manager.” From here, you can create a new account, add an existing account, or request access to an account. This will connect your Business Manager account with your Facebook ad account.
- Navigate to your Business Manager Dashboard and click “Business Settings.”
- Select “Data Sources,” then “Pixels,” and click “Add.”
- Name your pixel and click “Continue.”
- Click “Set Up The Pixel Now.”
- Choose “Use a Partner” if you use a website hosting service like WordPress.
- Next, you can set up pixel conversion events using the Open Event Setup Tool (however, you need to set up ads and a Facebook business page first).
Step 2: Verify domain
To use the Facebook Conversion API, you need to verify your domain with Facebook. Verifying domain helps Facebook reduce spam by ensuring advertisers direct users to legitimate websites.
- Open Business Settings.
- Click “Brand Safety,” then “Domains.”
- From the Domains page, click “Add” to open the “Add Domain” screen.
- Enter your domain name and click “Add Domain” to continue.
- You have three options to verify your domain: DNS verification, HTML file upload verification, and meta-tag verification.
Verifying DNS:
- Log in to your domain name provider and find DNS Records.
- Copy the TXT record provided by Facebook in the “Verify your Domain” section.
- Add the TXT record to your website as per your hosting provider’s instructions.
- Go back to Facebook Business Manager and click “Verify Domain.”
Upload HTML file verification:
- Download the HTML verification file provided by Facebook in the “Verify your Domain” section.
- Log in to your domain and find the root directory of your website.
- Upload the HTML file as instructed.
- Go back to Facebook Business Manager and click “Verify Domain.”
Verifying through meta-tag
- Copy the meta-tag provided by Facebook in the “Verify your Domain” section.
- Log in to your domain and find the source code of your website.
- Paste the meta-tag into the head section of your website’s source code.
- Click “Publish.”
- Go back to Facebook Business Manager and click “Verify your Domain.”
Note: Domain verification may take up to 72 hours.
Step 3: Install Conversion API on Facebook
Next, you’re ready to set up the Facebook Conversion API. In this stage, you need to connect your website to Facebook.
- Go to Facebook Events Manager and click Settings. Scroll down until you find Conversion API and click Choose a Partner. Select your partner and click Next.
- Select both boxes:
- Advanced matching
- New: Measure More of Your Customer’s Journey by Enabling the Conversion API
- Click “Create Access Token.” Save your token for later use and click “Continue.”
- Download the Facebook plugin and click “Continue.”
- In the backend of your website, select Plugins. Then, upload and install the Facebook plugin. Ensure it is activated.
- Both “Use Advanced Matching on Pixel?” and “Use Server-Side API?” should be enabled.
- Paste the access token you copied earlier into the Pixel ID field and click “Save.”
- Wait a few minutes for Facebook to confirm if you’ve configured the Facebook Conversion API correctly.
Note: If you encounter issues configuring the Conversion API, ensure you update the Facebook plugin. If the plugin is outdated, it will not configure correctly.
Step 4: Set up events
Once your website is connected to Facebook, you need to set up events. If you have experience with Facebook ads, you may have already set up your events (skip to Step 5 if this is the case). First, go to the “Connect your (Partner Integration) Account” screen on Facebook. You’ll see the “Add Events Using Event Setup Tool” section. Enter your website URL and click “Continue.” Then, you’ll see the “Event Setup Tool.” From this page, you can set up any events you want. Remember, you can always return to this page, so if you’re setting up your account for the first time, you may want to set up one event and come back later. Once you’re done, click “Finish” to close the setup widget.
Step 5: Configure your events
After setting up your events, you need to configure them. To complete this step, go to Facebook Events Manager and click Overview. Then, select Aggregated Event Measurement and Configure Web Events. Choose your verified domain to open the events. On this screen, Facebook will display a list of events from highest to lowest priority. This screen also allows you to edit, delete, reorder, and customize events as needed.
Step 6: Ensure everything is working
Now that you’ve set up the Conversion API and created some events, you need to ensure everything is working correctly. Fortunately, Facebook provides a tool to test your events. To start testing, go to Facebook Events Manager and click Data Sources. Then, click Test Events and Test Server Events. Next, click Graph API Explorer and follow the prompts to create a test. Facebook will use that payload to test if the Conversion API is working correctly. The testing process will take about 30 seconds.
Step 7: Run your first Conversion API ad
Note: At this stage, you might wonder if the pixel and Conversion API will send duplicate data. Fortunately, the answer is no. Facebook has a built-in tool to prevent these tools from reporting the same user data.
The above article by Optimal Agency has provided detailed and accurate information. We hope the content will help you understand how to set up Conversion API on Facebook works and successfully implement the methods to create Conversion API on this platform.
See more articles:
- The importance of Facebook Ads conversion rate
- The secrets to building a Landing Page with a high conversion rate
- How to increase conversion rate for website in 2024
FAQ
The Ladipage Conversion API is a powerful tool that helps marketers track and optimize ad campaigns effectively. By using this API, you can collect detailed data on customer behavior on landing pages created with Ladipage. Events such as form submissions, call-to-action button clicks, and other interactions are recorded. This data can then be transferred to advertising platforms like Facebook or Google to improve targeting, campaign optimization, and accurate measurement of results, enhancing marketing performance and ROI for businesses.
Connecting the Haravan API involves integrating your system with the Haravan e-commerce platform to share data and optimize online business operations. By using this API, you can synchronize product information, orders, customers, and other data between your system and Haravan. This helps you manage and operate your online store more efficiently, while also providing a better shopping experience for your customers.